【Blender】知ってるだけで時短に?!Blender㊙テクニック10選!!
福田です!
今日は、知っているのと知らないのとでは作業時間に圧倒的な差が出てくる機能について説明していきます!
Blenderの標準機能をたくさん覚えてどんどん活用していきましょう!
機能リスト
- Beautiful faces (面を綺麗にしてくれます)
- Tris to Quads (三角ポリゴンを四角ポリゴンに変えてくれます)
- Poke Faces (斜めに細分化してくれます)
- Knife Project (選択した線の形状に合わせてメッシュをカットしてくれます)
- Vertex Slide (頂点を線に沿って移動することができます)
- Transform Origins (原点を直接もって操作できます)
- Cursor to Selected (現在選択している頂点や面の中心に3Dカーソルを移動できます)
- Set Origins to 3D Cursor (3DCursorの位置に原点を移動させます)
- Face Snap (オブジェクトを面に対して垂直にスナップさせます)
- Un Subdivide (細分化の修復がある程度出来ます)
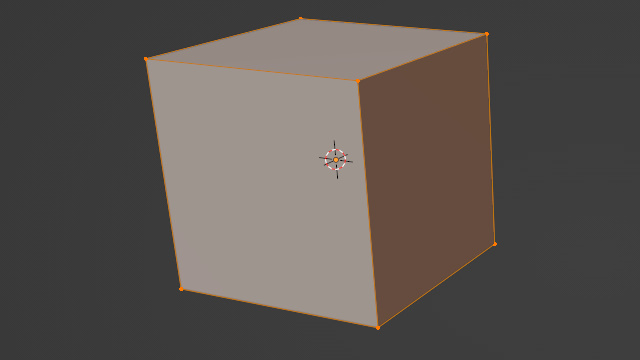
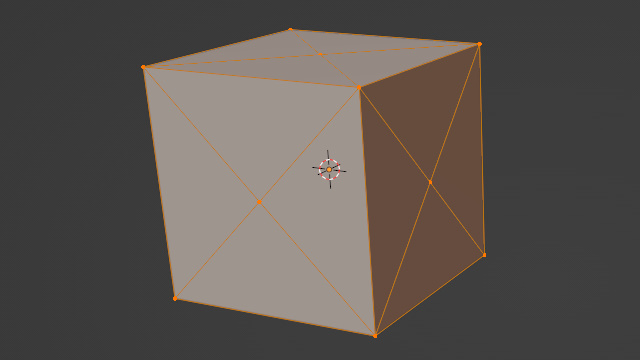
Beautiful face
Edit(編集)モードのFace(面)メニュー内にあります。
使用例
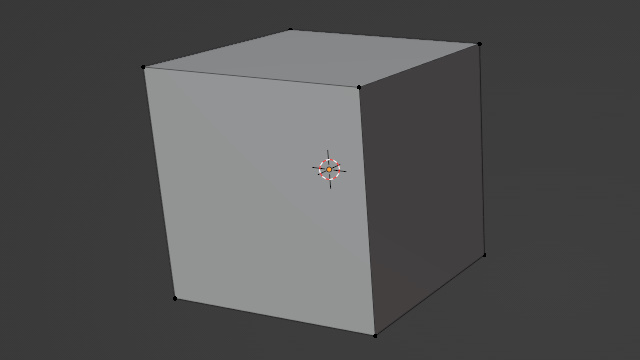
Tris to Quads
Edit(編集)モードのFace(面)メニュー内にあります。
使用例
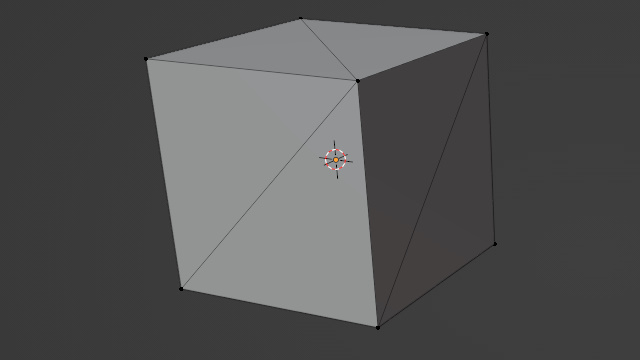
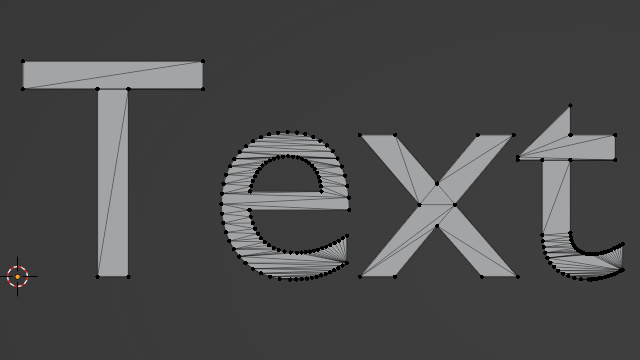
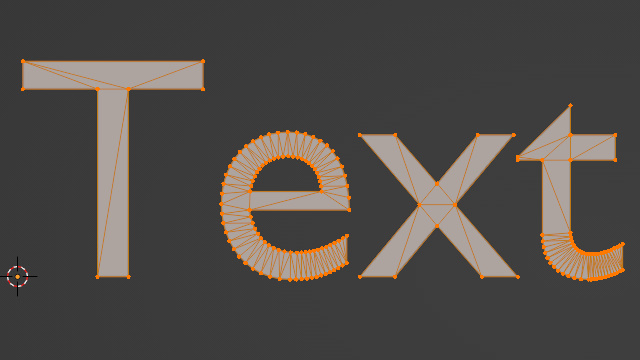
Poke Faces
Edit(編集)モードのFace(面)メニュー内にあります。
使用例
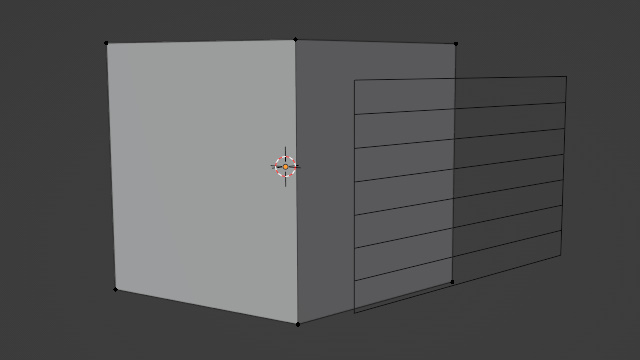
Knife Project
Edit(編集)モードのMesh(メッシュ)メニュー内にあります。
まず、切りたいオブジェクトを選んで編集メニューに行き、そのあとにctrlを押しながらナイフにするエッジを選択します。
実行すると使用例のように、Viewからの視点でメッシュが切られます。
使用例

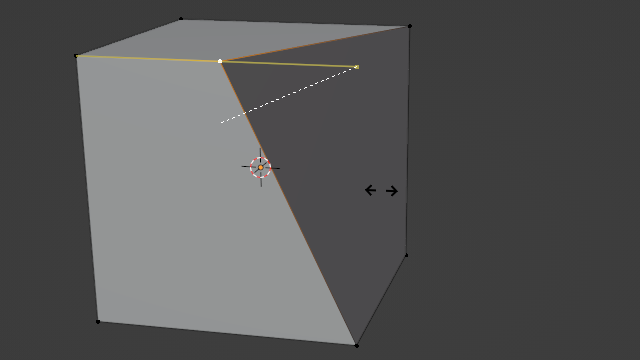
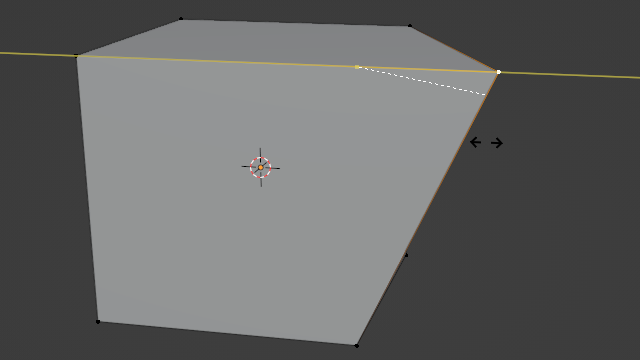
Vertex Slide
頂点を選択した後にGキーを2回押すと、Vertex Slideモードになります。
また、Vertex Slide中にCキーを押すとClamp(移動の限界)がoffになるので、線方向に伸ばすこともできます。
使用例
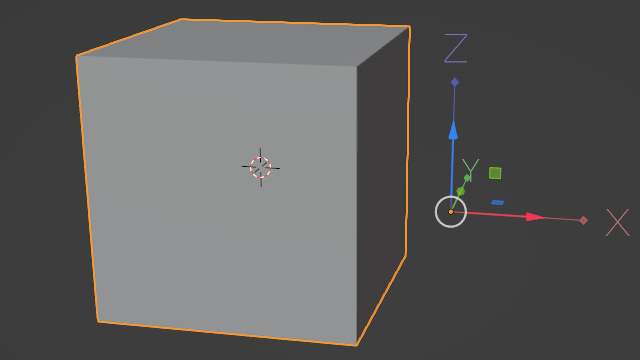
Transform Origins
Objectモードで右上のoptionを押すと、Affect Only Originsというのがあります。
それにチェックを入れると、オブジェクトの原点のみを移動させることが出来る様になります。
Snapも併用できるので、使いやすい位置に原点を移動させましょう!
Mirrorなど使う際にもおすすめです!
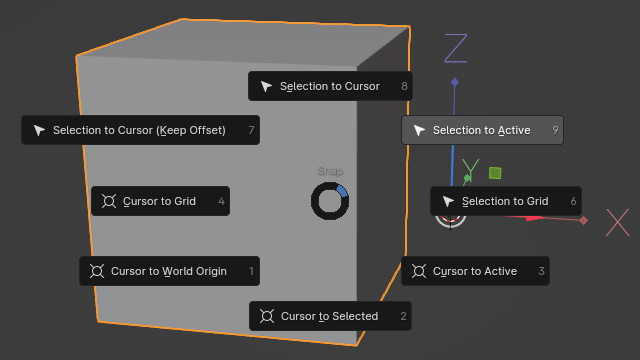
Cursor to Selected
Shift+Sを押すとホイールメニューが出てきます。
その中の下がCursor to Selectedです!
この後の機能と合わせて使うことが多いので合わせてお覚えください!
Set Origin to 3D Cursor
ObjectモードでObject → set Origin → Origin to 3D Cursorです!
現在の3DCursorの位置に原点を移動させてくれるので、とても使いやすいです!
例えば、長方形のある頂点を中心に拡大や回転をしたいときには、そこに原点を置く必要があります。
そんな時に、原点を選んでCursorの移動→Cursorの位置に原点を移動とするとすぐに原点を必要な場所に移動させることが出来ます!
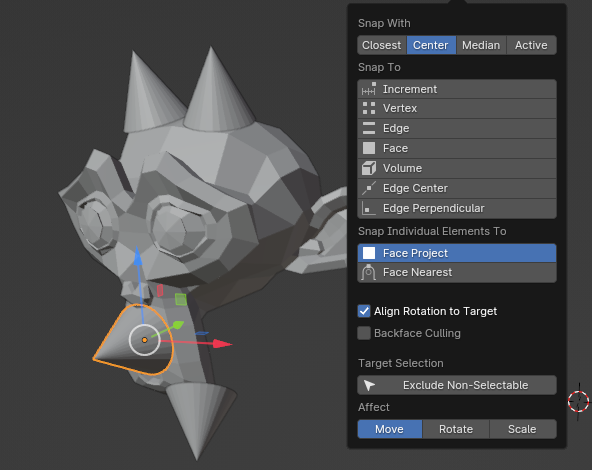
Face Snap
下の画像のように設定をしてあげることで、原点を基点にオブジェクトの面上にオブジェクトを配置できます!
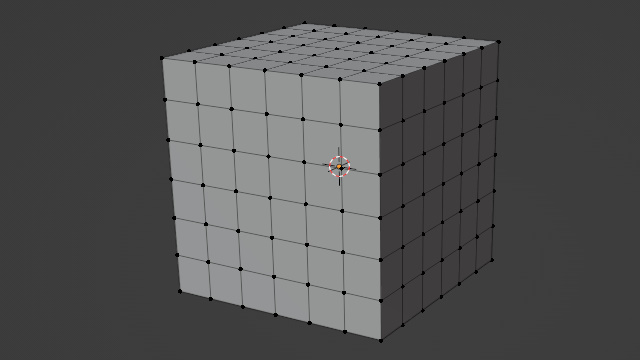
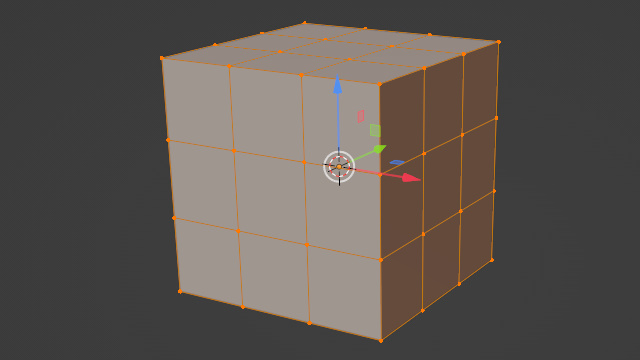
Un Subdivide
Editモードから、EdgeのUn-Subdivideです!
下のようにある程度除去してくれるので手作業を減らせます!
使用例
以上!おすすめBlenderテクニック10選でした!!
身近すぎて入れるのを忘れているテクニックもあると思うので、またおすすめテクニックがあれば紹介しようと思います!
福田でした!ありがとう!
現在シェルパグループでは、一緒に働く仲間を募集中!
建築パース、3DCG、UnrealEngine、Unity、プログラミングに興味のある方は
是非リクルートサイトをご覧ください!
■リアルな3DCG制作の仕事をしたい方必見!
https://sherpa-recruit.jp/