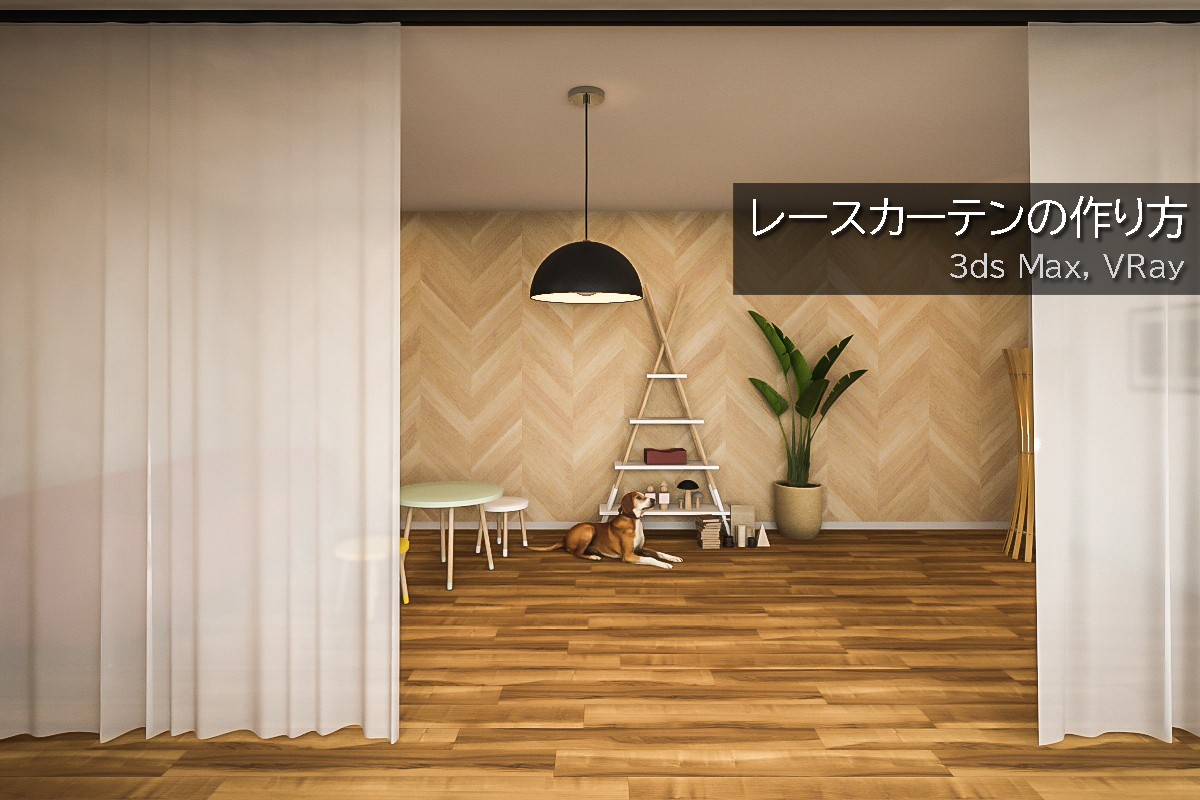
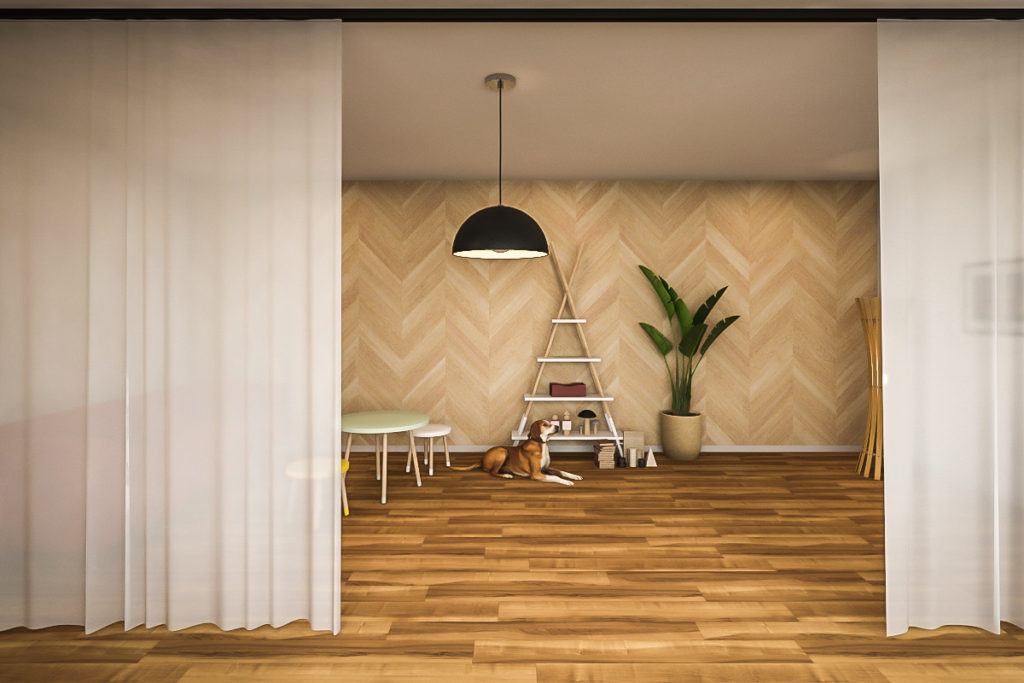
レースカーテンを3dsMaxで簡単に作れるやり方!!
こんにちは、林と書いてリンです。
今日はレースカーテンを速く作れる方法を紹介します。
3dsMaxで作ってますが、似たような機能は他のソフトにもあると思います。
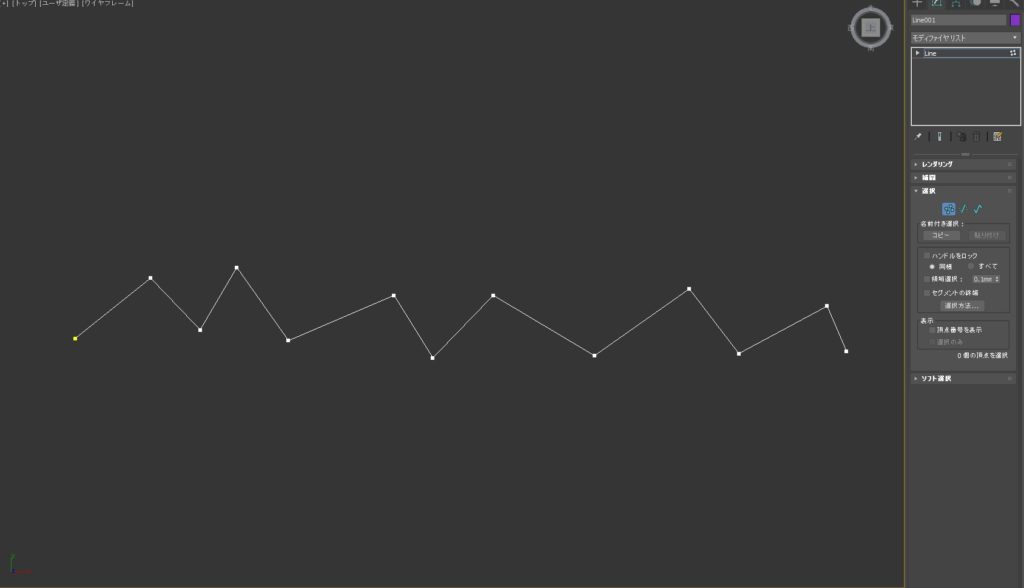
まずスプラインを適当にカーテンのラインになるように引いて
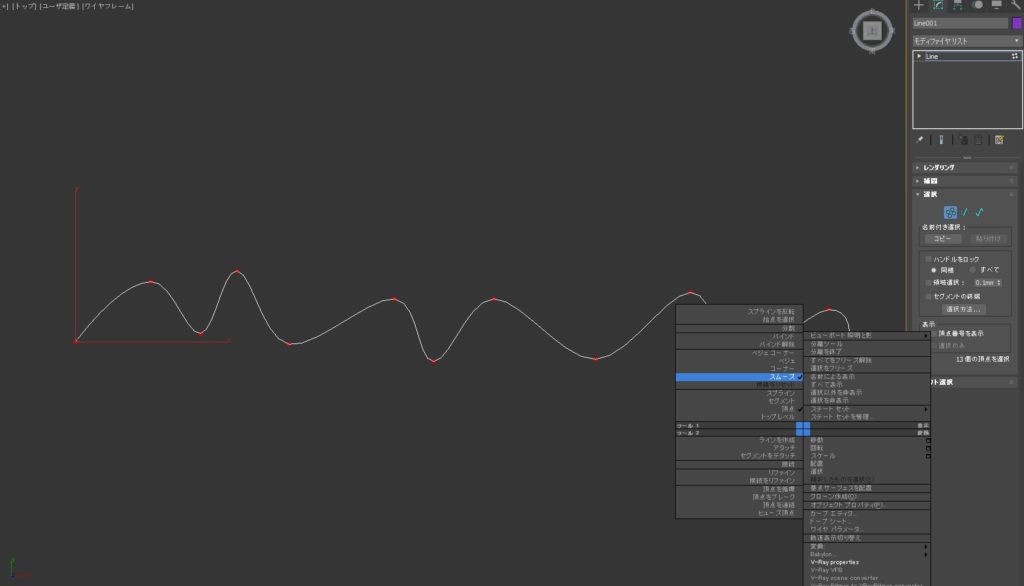
右クリックですべての頂点をスムーズにします。
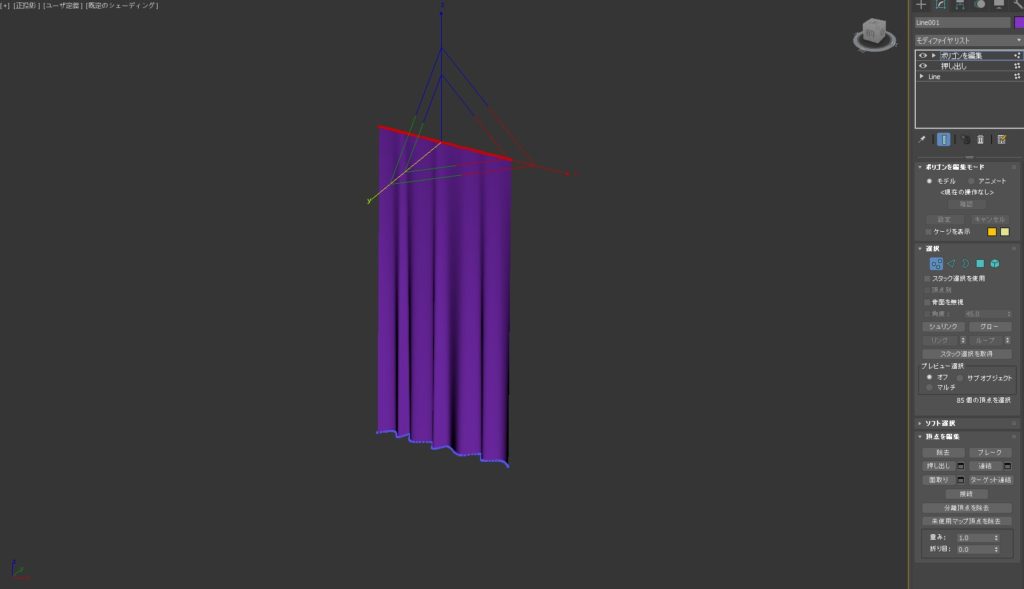
出来たラインをそのまま押し出しして
画像のように「ポリゴン編集」で上の頂点のみを
スケールでほぼ一直線になるように調整したら
モデリングは終わります。
前はカーテンのデータを保存して使うたびにもってきてましたが
このやり方であれば探してくるより作った方が早かったりします。
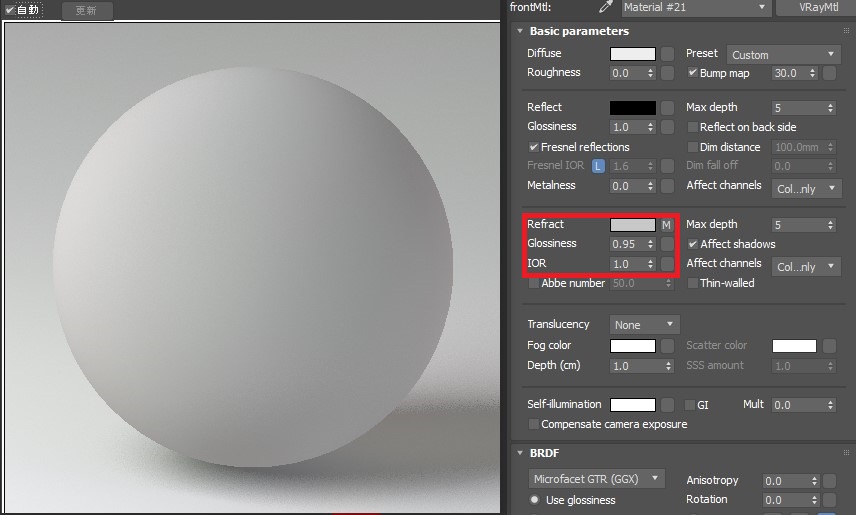
最後大事なのはマテリアルです。
マテリアルで透明をレンダリング画像を
確認しながら入れてください。
画像では100で入れてます。
出来れば透明のところに「フォールオフ」を入れてあげたら
より立体感が出ます。
後は「Glossiness」ぼかしを少し入れます。
画像では0.95にしてますが、
これは明るさと後ろの物体の近さによって変わるので
毎回確認したほうがいいです。
「IOR」屈折率をなくして完成です。
一瞬で終わりました。 😆
いつもBLOGを見てくださってありがとうございます。
応援お願いします。Thank you !!